

Learning how to draw French tip nails at home is a simple way to create a polished manicure without needing a salon appointment every time. The classic French tip has a clean, timeless appearance, but there are many ways to make the technique feel fresh and personal. With the right nail shape, a steady hand, and a few basic tools, beginners can practice creating smooth curved tips at home. You can keep the look traditional with white polish and a sheer nude base, or experiment with colorful, metallic, pastel, and minimalist versions. These ideas are suitable for everyday manicures, special occasions, work-friendly nail looks, and weekend beauty projects. The key is not trying to make every nail identical on the first attempt. Instead, focus on controlling the brush, creating an even smile line, and building thin layers of polish. The 21 French tip nail ideas below give you different designs to practice while keeping the overall manicure neat, wearable, and Pinterest-friendly.
Classic White French Tips

Classic white French tips are the best place to start when learning how to draw French tip nails because the design is simple and easy to recognize. Begin with a clean nail and apply a sheer nude, pink, or neutral base coat to create a smooth background. Once the base is completely dry, use a thin nail-art brush to create a curved white line across the free edge of the nail. Instead of trying to paint the entire tip in one movement, work from one side toward the center and then repeat from the opposite side. This gives you better control over the curve and makes it easier to correct uneven areas. Keep the white polish thin so the tip does not become bulky. Short, medium, and long nails can all work with this design when the curve is adjusted to the nail length. A glossy top coat helps connect the white tip visually with the base and gives the manicure a clean finish. This classic version is especially useful for beginners because it teaches the basic French-tip technique before you move into more complicated designs.
Thin Micro French Tips

Micro French tips are a delicate version of the traditional manicure and are especially useful if you prefer a minimalist appearance. Start with a sheer neutral base that allows the natural-looking nail to remain visible. After the base dries, use a very fine nail-art brush with a small amount of white polish. Draw an extremely narrow curved line along the very edge of each nail rather than creating a wide tip. The smaller line gives the manicure a subtle appearance while still providing the recognizable French-tip shape. A thin brush makes it easier to control the width, but you can also clean the edges with a small detail brush dipped lightly in polish remover. This design works particularly well on short or medium nails because the narrow tip does not visually overwhelm the nail plate. Keeping the curve shallow can also make the finished manicure look more delicate. Finish with a glossy top coat after the white polish has dried completely. Micro French tips are a great choice when you want something understated enough for everyday wear but still polished enough for a special occasion.
Rounded French Tips

Rounded French tips create a soft, traditional appearance by following the natural curve of the nail instead of using a dramatic smile line. Apply a neutral base first and let it dry before working on the white tip. Use a thin brush to create a gentle arc that mirrors the shape of the nail edge. The center of the white tip can be slightly higher than the sides, but the curve should remain smooth rather than sharply pointed. This approach is especially easy to adapt because the line can be adjusted according to whether your nails are round, oval, or squoval. If you are new to nail art, painting each side separately can give you greater control over symmetry. Keep the brush loaded with only enough polish to make a controlled line. Once the outline looks even, fill the remaining free edge carefully without covering too much of the neutral base. A glossy top coat brings the colors together and helps create a salon-inspired finish. Rounded French tips are a dependable option when you want classic nail art with a softer visual effect.
Square French Tips

Square French tips give the manicure a crisp and structured appearance that pairs especially well with square or squoval nail shapes. Begin with a neutral base color and allow it to dry before applying the white tip. Rather than emphasizing a deep curve, keep the French line relatively straight while gently following the natural width of the nail. A thin detail brush can help you create clean side edges before filling the center of the tip. If the nail is short, keep the white section narrow so the design remains balanced. Longer square nails can accommodate a slightly wider tip without appearing crowded. Try to keep the thickness consistent across all ten nails for a more professional result. Any small mistakes can be corrected with a clean angled brush dipped in remover. Once the tips are completely dry, apply a glossy top coat with smooth strokes. Square French tips are ideal when you like clean geometry and a manicure that feels classic but slightly more structured.
Almond French Tips
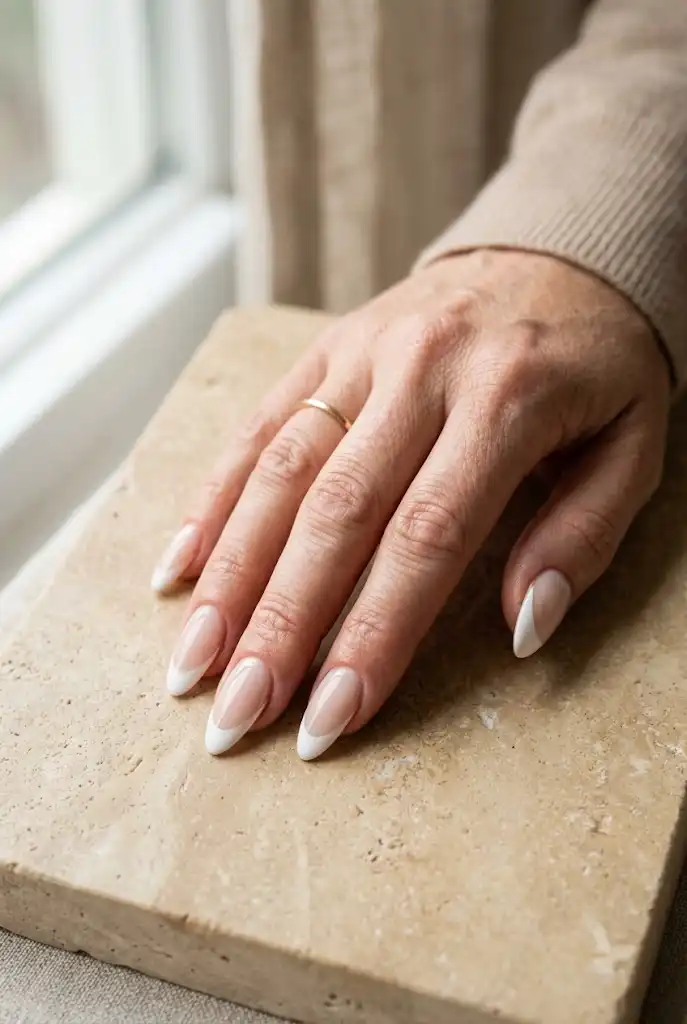
Almond French tips combine the elegant silhouette of an almond nail with the clean contrast of a traditional French manicure. The tapered nail shape naturally creates a refined base for a curved white tip. Start with a sheer beige, pink, or milky nude base to keep the overall design soft. When drawing the white tip, follow the tapered shape rather than making the smile line excessively wide. The center of the tip can sit slightly higher while the sides taper naturally toward the nail walls. Using a thin brush allows you to control the curve and prevent the white polish from spreading into the nude base. This design looks especially balanced when every nail has a similar tip depth. If you are practicing at home, use very small amounts of polish and build coverage gradually. A glossy top coat gives the almond shape a smooth reflective finish. This version works beautifully for weddings, dinners, work settings, and everyday manicures when you want an elegant result without complicated nail art.
Pink French Tips

Pink French tips offer a softer alternative to white while keeping the basic structure of the classic manicure. Choose a sheer pink or nude base and select a slightly stronger pink shade for the tip. Soft blush, rose, dusty pink, or muted berry can all create different moods while remaining wearable. Draw the tip using the same side-to-center technique used for traditional French nails. Keeping the tip line thin helps maintain a refined appearance rather than turning the design into a full-color manicure. For a more delicate look, use a pale pink that creates subtle contrast with the base. If you want the tips to stand out, choose a slightly deeper shade while keeping the rest of the nail neutral. The design can be adapted to round, oval, almond, and squoval shapes. A glossy finish enhances the color contrast and makes the manicure look freshly finished. Pink French tips are particularly useful when you want a feminine manicure that feels modern without becoming overly elaborate.
Black French Tips
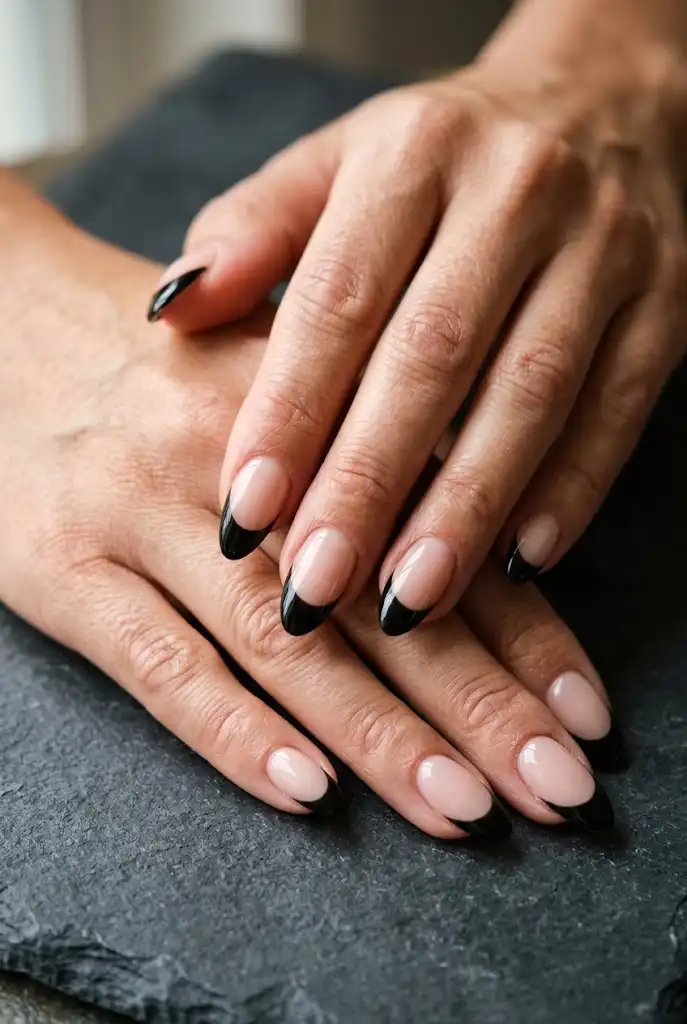
Black French tips turn the traditional manicure into a sharper and more modern design. Begin with a sheer nude, beige, or translucent pink base to provide contrast against the dark tip. Use a fine brush and work slowly because black polish can make small mistakes more noticeable. Draw the curved line first and then carefully fill the free edge without creating a thick or uneven border. A slightly thinner black tip often looks more sophisticated than a very wide one. Almond and coffin shapes can make the design feel especially dramatic, while short squoval nails can keep it understated. If the black polish looks uneven after the first coat, allow it to dry and add a second thin layer rather than applying too much product at once. Finish with a clear glossy top coat for a sleek appearance. You can also choose a matte top coat if you prefer a softer contrast. Black French tips are a versatile option for evening events, minimalist outfits, or anyone who wants a French manicure with more personality.
Colorful Rainbow French Tips

Rainbow French tips let you practice the same basic French technique while introducing multiple colors across the manicure. Start with a neutral or milky base so the colored tips remain the main visual feature. Choose a coordinated palette such as soft rainbow pastels, bright summer shades, or muted tones rather than using random colors that compete with each other. Assign one color to each nail or repeat a smaller group of shades for a more cohesive appearance. Draw each tip with a fine brush using the same curved technique as a classic French manicure. Try to keep the width of every tip similar even though the colors are different. If one color needs more coverage, apply a second thin layer after the first has dried. A glossy top coat can make the entire collection look more unified. Rainbow French tips are particularly fun for vacations, summer weekends, festivals, birthdays, or colorful everyday outfits. The design also gives beginners a chance to practice precision without changing the basic painting method.
Glitter French Tips

Glitter French tips add sparkle to the traditional design while keeping most of the nail simple. Use a sheer nude or pale pink base so the glitter remains concentrated along the tips. A fine glitter polish is easier to control than large glitter particles when you are drawing a French line at home. Apply the tip with a thin brush and build the glitter gradually until you achieve the desired coverage. You can choose silver for a cool, classic finish or champagne and rose-gold tones for a warmer appearance. Keeping the base understated helps prevent the manicure from looking overly busy. A clear top coat can smooth the surface and lock the glitter into place. If you want more dimension, place slightly denser glitter near the outer edge and let it become lighter toward the center. This technique creates a subtle fade while preserving the recognizable French shape. Glitter French tips are particularly suitable for parties, holiday gatherings, date nights, weddings, and celebrations.
Blue French Tips
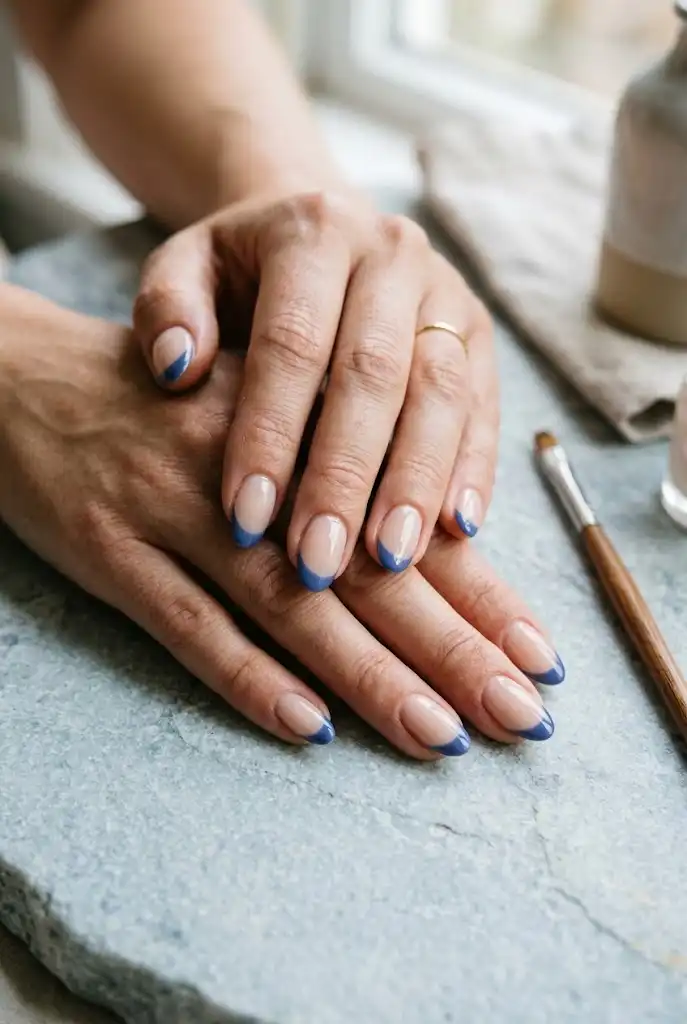
Blue French tips give the classic manicure a fresh color update without changing the basic technique. Choose a blue shade that suits the mood you want, such as soft powder blue, muted denim, navy, or bright cobalt. Keep the base neutral so the blue remains clearly visible along the nail edges. Use a fine brush to create a smooth curve and work slowly around each side of the nail. If you are using a strong blue shade, wipe excess polish from the brush before painting to prevent flooding the cuticle area. A thin layer often provides enough coverage for the tip, especially with highly pigmented polish. The design looks particularly clean on almond, oval, and squoval nail shapes. For an understated manicure, choose a pale blue close to the base color. For stronger contrast, a deep navy tip over milky nude nails creates a sophisticated effect. Blue French tips are a practical choice for everyday wear when you want a classic design with a noticeable but controlled color accent.
Double French Tips
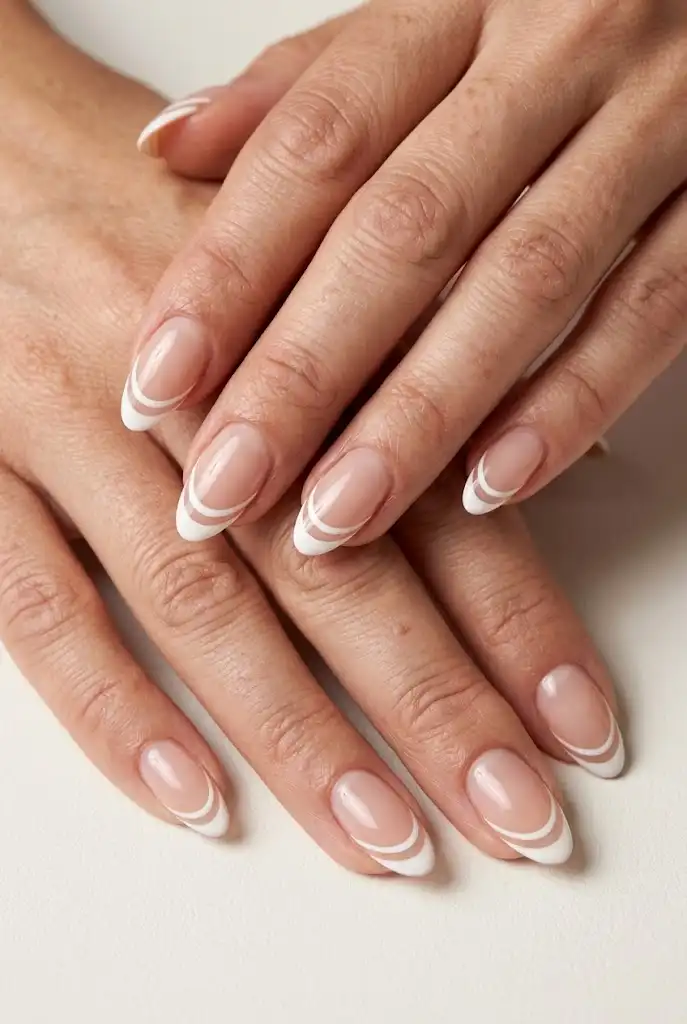
Double French tips create two parallel curved lines instead of one, giving the manicure more visual detail while keeping the overall design clean. Begin with a neutral base and allow it to dry completely. Use a thin brush to draw the first French line close to the free edge. After it dries slightly, add a second curved line just above the first while leaving a narrow strip of the base visible between them. The two lines should follow the same curve so they look intentional rather than uneven. You can use the same color for both lines or combine complementary shades for a more creative effect. Keeping both lines thin is important because overly thick stripes can make the nail look crowded. This design works particularly well on medium and long nails where there is enough surface area for two curves. A glossy top coat helps soften the transition between the lines and the base. Double French tips are a great next step after mastering the traditional one-line French manicure.
V-Shaped French Tips
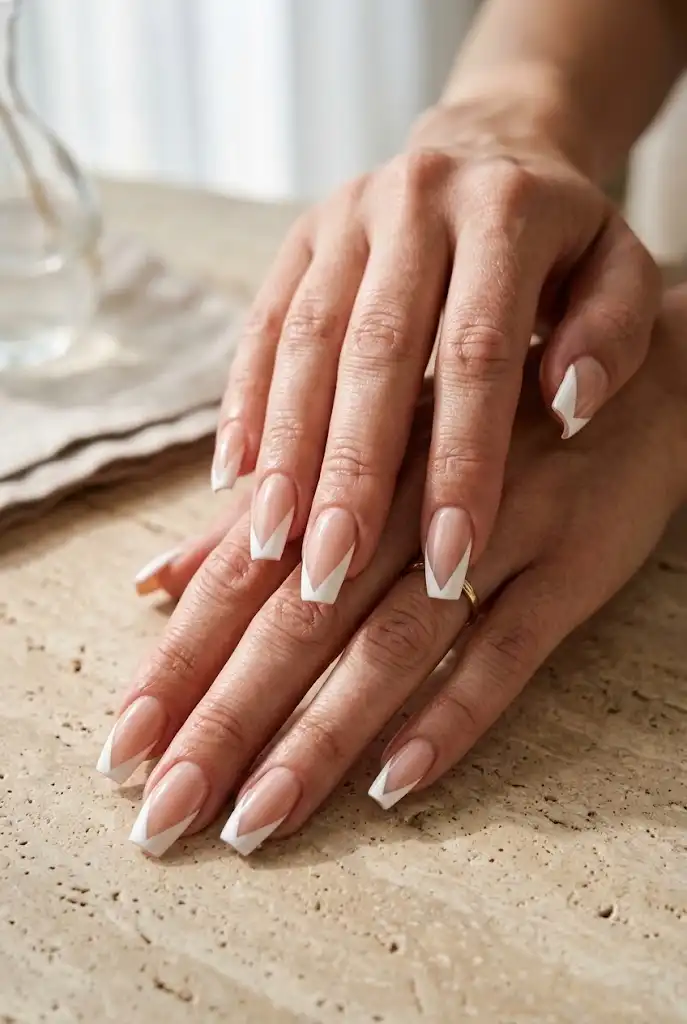
V-shaped French tips replace the traditional rounded smile line with a clean angular point in the center of the nail. This shape creates a modern appearance and can make the nail design feel more graphic. Start with a neutral base and allow it to dry fully. Use a fine brush to create one diagonal line from one side of the nail toward the center, then repeat from the opposite side to form a V. The two sides should meet neatly at the center without becoming too sharp or uneven. You can use white polish for a classic version or select black, red, navy, or another contrasting shade. Long almond or coffin nails provide plenty of space for the angular design, but a smaller V can also work on shorter nails. Keep the lines thin if you want a minimalist result. Correct uneven edges with a tiny cleanup brush before applying the top coat. V-shaped French tips are ideal when you want the familiar French manicure concept but prefer sharper geometry.
Nude-on-Nude French Tips
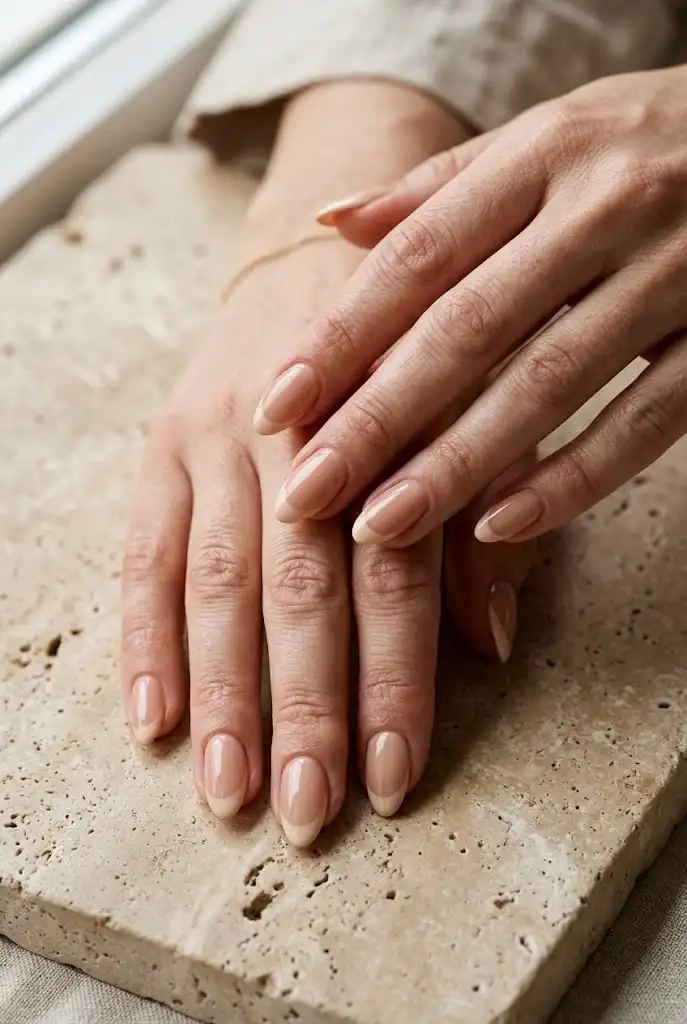
Nude-on-nude French tips use two closely related neutral shades instead of a strong white contrast. This technique creates a subtle manicure where the French design is visible mainly through changes in tone and finish. Start with a warm beige, pink nude, or milky neutral base. Choose a second nude shade that is slightly lighter or darker for the tip. Draw the French curve carefully along the nail edge and keep the color difference noticeable enough to define the shape. A glossy base and slightly sheer tip can create a sophisticated layered effect. You can also use a matte nude base with glossy tips for contrast through texture rather than color. This style is especially useful for minimalist wardrobes and professional settings where dramatic colors may feel too bold. It also gives beginners some flexibility because tiny inconsistencies are less obvious when the colors are closely related. A clean top coat completes the look and keeps the neutral tones looking fresh. Nude-on-nude French tips show that French nail art does not need high contrast to feel polished.
Red French Tips

Red French tips add a bold accent while preserving the clean shape of the traditional manicure. Use a sheer nude or pale pink base to make the red edge stand out. Classic cherry red creates a timeless appearance, while deeper wine or burgundy can make the design feel more sophisticated. When drawing the tip, use a fine brush and remove excess polish before starting each nail. Create the curve gradually rather than pressing the brush too firmly against the nail. Because red polish is highly visible, take time to clean the side edges if any color spreads outside the intended area. A narrow red tip is a good choice for everyday wear, while a slightly wider tip can make the manicure more dramatic. Almond and oval nail shapes work particularly well with this color because the curved edge complements the shape. Finish with a high-shine top coat for a polished result. Red French tips are especially suitable for date nights, holidays, celebrations, or anyone who wants a classic manicure with a stronger accent.
Pastel French Tips
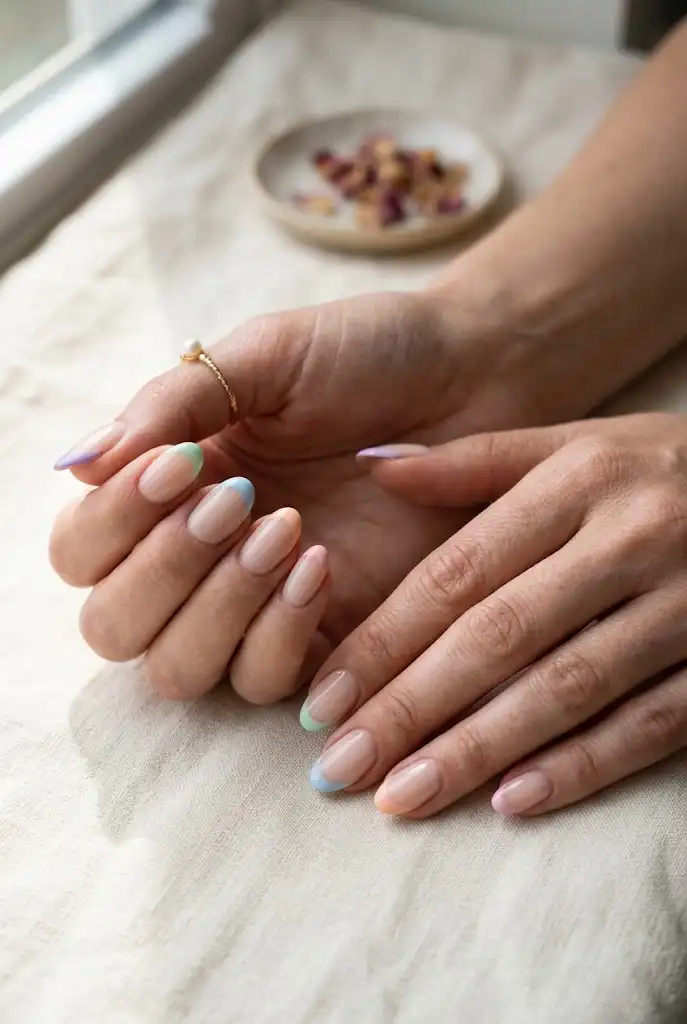
Pastel French tips are a soft way to experiment with color while maintaining the clean structure of a French manicure. Begin with a translucent milky or pale nude base so the pastel shades remain the focus. You can choose one pastel color for every nail or rotate complementary shades such as lavender, mint, baby blue, peach, and blush pink. Use a fine nail-art brush to draw each curved tip and keep the width consistent. Pastel polishes can sometimes appear sheer, so thin layers are usually easier to control than one thick application. Let the first coat dry before adding additional coverage where needed. Short and medium nails can look especially fresh with narrow pastel tips. A glossy top coat gives the colors a smooth finish and helps the different shades feel connected. Pastel French tips work well for spring-inspired outfits, vacations, brunches, casual weekends, and everyday beauty looks. They are also a beginner-friendly way to practice multiple colors without learning complicated nail-art patterns.
French Tips With a Shimmer Base
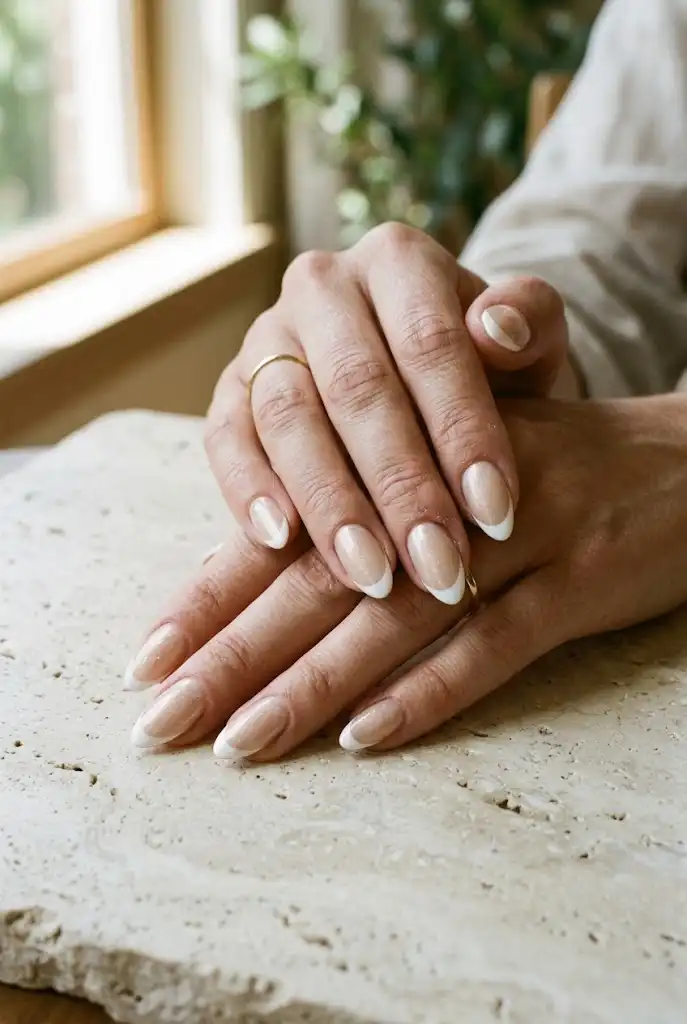
A shimmer base gives the traditional French manicure a subtle reflective quality without changing the tip itself. Choose a sheer nude, pink, or champagne polish with fine shimmer rather than large glitter particles. Apply one or two thin coats and let the base dry completely before painting the French tips. White tips provide a classic contrast against the softly reflective background. Use a fine brush to draw the curved line and avoid dragging the brush repeatedly across the shimmer layer. A smooth, controlled stroke helps preserve the base underneath. This style can look especially beautiful under natural light because the fine shimmer catches small highlights without becoming overly sparkly. Keep the nail shape consistent so the reflective finish does not distract from the clean French design. A glossy top coat enhances the shimmer and creates a smooth surface. This version works for everyday manicures but can also feel appropriate for weddings, celebrations, and evening occasions. It is a useful choice when you want traditional French tips with a little extra dimension.
French Tips With a Metallic Edge
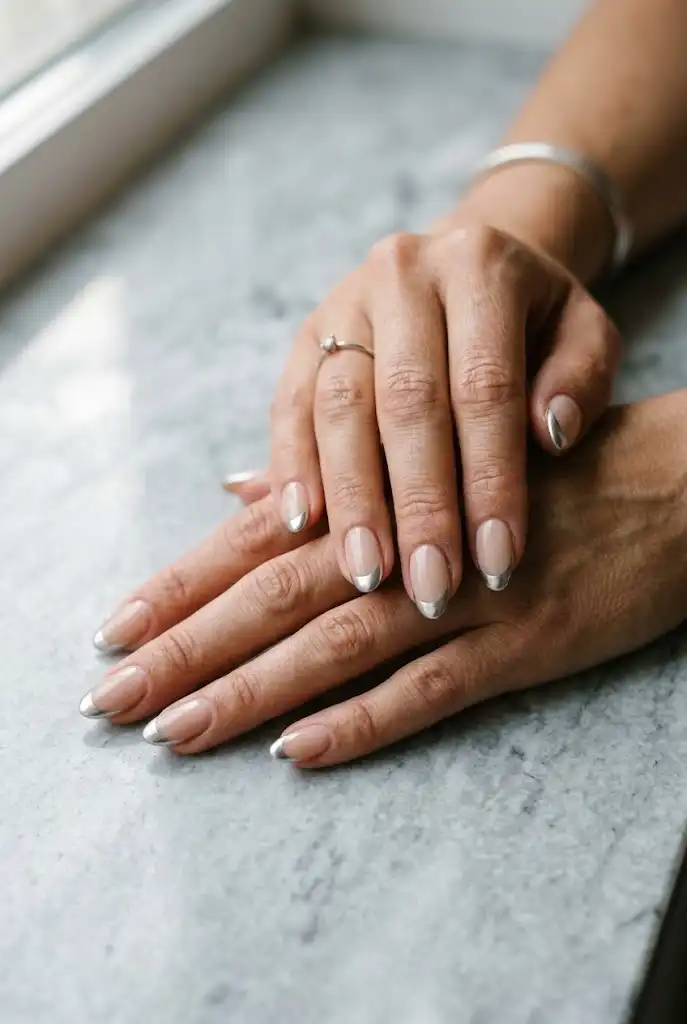
Metallic French tips add a reflective finish to the tip while keeping the base neutral and simple. Silver is a versatile choice, but soft gold, rose gold, or bronze can create a warmer appearance. Start with a sheer nude base and allow it to dry before applying the metallic color. Metallic formulas can be more fluid than regular polish, so use a small amount on a fine brush to avoid flooding the nail edge. Draw the curved French line slowly and fill the tip with thin coverage. A second layer may be useful if the metallic shade looks patchy after drying. Keep the base relatively understated so the reflective tips remain the main feature. This style can look especially polished on almond or oval nails where the metallic curve follows the natural silhouette. A glossy top coat will increase the shine, while a carefully selected top coat can soften the finish if desired. Metallic French tips are a strong option for holidays, evening events, parties, or modern minimalist outfits.
French Tips on Short Nails

Short nails can look just as polished with French tips when the design is scaled correctly. The most important adjustment is keeping the white section narrow so it does not cover too much of the nail. Begin with a sheer nude or pink base and allow it to dry before painting the tip. Use a very fine brush to create a shallow curve that follows the natural edge of each short nail. If a traditional smile line feels difficult, you can create a very thin micro French tip instead. Short squoval and rounded shapes are especially practical for this style because they provide a natural edge to follow. Work slowly and use minimal polish on the brush to maintain control around the smaller surface. After the tips dry, apply a clear top coat to smooth the manicure. This design is useful for people who prefer practical nail lengths for typing, household tasks, or everyday routines. Short French tips prove that you do not need long nails to achieve a clean and sophisticated manicure.
French Tips With a Matte Base
A matte base creates a modern contrast against glossy French tips. Start by applying a neutral nude or pale pink polish as the base and allow it to dry thoroughly. Once dry, use a fine brush to paint the French tips in a contrasting shade such as white, black, burgundy, or another color. After the design is complete, apply a matte top coat over the base and tips if you want the entire nail to have a soft finish. For a stronger texture contrast, use a matte top coat on the base and leave the French tips glossy, although this requires careful application. A matte nude base with glossy white tips can create a particularly sophisticated effect. The design works best when the French curve is clean because the difference in finish makes the shape easy to notice. Avoid applying thick layers because matte products can emphasize uneven texture. Let each layer dry properly before moving to the next step. This style is ideal when you want French nails that feel modern, understated, and slightly different from the traditional glossy manicure.
French Tips With a Tiny Accent

Adding one tiny accent to a French manicure can create interest without making the entire design complicated. Start by painting a traditional French tip on every nail using white or another neutral color. Once the manicure is dry, select one or two nails for a small accent such as a tiny dot, minimalist heart, delicate star, or single rhinestone. Keep the accent small enough that the French tip remains the main feature. A tiny gold dot near the base of the nail can provide a subtle decorative detail without overwhelming the design. If you prefer something playful, a miniature heart can add personality while keeping the rest of the manicure classic. Use a dotting tool or fine detail brush for better precision. Avoid adding multiple decorations to every nail because the design is strongest when the accent remains selective. Finish with a clear top coat to protect both the French tips and the small decoration. This approach is excellent for beginners who want to experiment with nail art while maintaining a polished overall appearance.
French Tips With a Soft Ombré Base

A soft ombré base creates a seamless transition from natural pink near the cuticle to a milky white appearance toward the tip, giving the French manicure a blended finish. Begin with a sheer pink or nude base and use a makeup sponge or soft nail-art technique to create a gradual transition. The ombré should remain subtle so the French structure does not disappear completely. Once the gradient is dry, add a very thin white French line along the free edge for extra definition. This combination works particularly well on almond and oval nails because the gradual color transition follows the length of the nail naturally. Use thin layers instead of trying to create the full gradient in one application. A glossy top coat helps smooth the surface and enhances the soft color transition. If you prefer a more minimalist manicure, the French line can be extremely thin. For a more noticeable design, make the white tip slightly wider while keeping the ombré transition smooth. This style is a beautiful final step for anyone who has practiced classic French tips and wants to combine the technique with a more blended base.