

Bow nail art is a sweet way to add a feminine detail to a manicure without making the design feel overly complicated. For beginners, a small bow can become the focal point of a nail while the rest of the manicure stays clean and wearable. You can create bow details with nail polish, a fine nail-art brush, dotting tool, nail stickers, or small decorative charms. Soft pink, white, nude, red, black, and pastel shades all work beautifully for different versions of this look. A bow can also be placed in the center of the nail, near the cuticle, on a French tip, or as a tiny accent on one or two fingers. The ideas below focus on simple techniques that can be adapted for short, medium, or longer nails. Whether you are doing your own manicure at home or looking for inspiration before your next salon appointment, these bow nail designs offer plenty of approachable options.
Tiny White Bow on a Nude Base

A tiny white bow is one of the easiest places to start when learning bow nail art. Begin with a sheer nude, beige, or soft pink base so the white detail has a clean background. After the base color has completely dried, use a very thin nail-art brush to create two small loops in the center of the nail. Add a tiny connecting line between the loops and finish with two short tails pointing downward. The bow does not need to be perfectly symmetrical to look charming, so beginners should focus on keeping the design small and balanced. This style works especially well on short square, squoval, or almond nails. You can place one bow on each ring finger while keeping the other nails plain. A glossy top coat helps the simple design look polished and finished. For an even easier version, use a tiny white bow sticker instead of painting the shape by hand.
Pink Bow on a Milky White Manicure

A milky white manicure gives bow nail art a soft and romantic appearance while keeping the overall design beginner-friendly. Apply two thin layers of translucent milky white polish and allow each layer to dry properly before adding the decoration. For the bow, choose a gentle pink shade that contrasts with the base without becoming too bold. Paint two small rounded loops close together and add a tiny center knot using the same pink polish. Two narrow tails can be added underneath to make the shape immediately recognizable as a bow. If painting the entire bow feels difficult, create a tiny pink dot in the middle and build each loop outward from it. This technique gives you a useful guide for keeping the design centered. The look works beautifully as an accent nail, especially when the remaining nails stay completely milky white. A glossy top coat can blend the design together and give the manicure a fresh salon-style finish.
Bow French Tip Accent
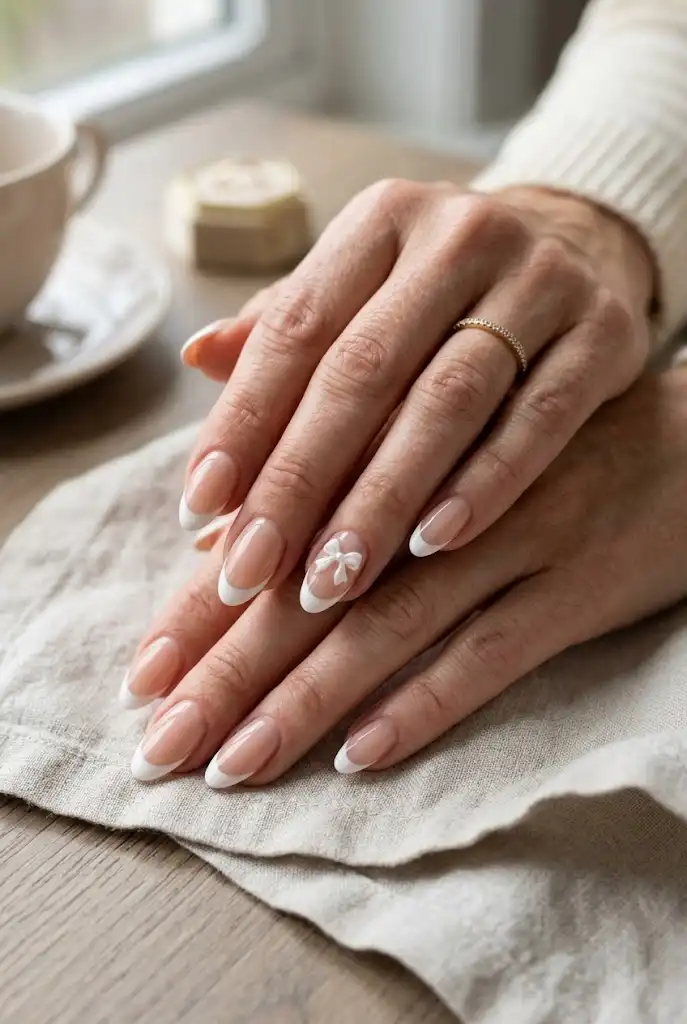
Combining a classic French manicure with a small bow creates a polished look that is still simple enough for beginners. Start with a sheer nude or pink base and create traditional white French tips on most of the nails. Instead of covering every nail with decoration, add a tiny bow near the base of one or two accent nails. A white, pink, or black bow can work depending on how much contrast you want. Keeping the bow small prevents it from competing with the French tip. Beginners who struggle with freehand French tips can use French-tip guides or stickers to create a cleaner curve. Once the tips are dry, use a fine brush to add the bow detail. This design is especially versatile because it can work for everyday outfits, bridal-inspired manicures, or special occasions. The combination of the clean French line and delicate bow creates visual interest without requiring complicated nail art.
Red Bow Accent Nails

Red bows provide a stronger contrast and are a fun option when you want your manicure to feel playful and noticeable. Keep the base simple with nude, cream, or sheer pink polish so the red decoration becomes the visual focal point. Instead of painting bows on every finger, use them on two accent nails for a cleaner beginner-friendly design. A fine brush can create the two loops first, followed by the small center knot and pointed tails. If your hands are not steady enough for freehand details, a small bow nail sticker can produce a similar effect with less effort. Red works particularly well for festive occasions, date-night manicures, and classic feminine nail looks. You can also coordinate the red bow with a red French tip on another nail. Keep the remaining nails glossy and minimal so the manicure does not become visually crowded. A high-shine top coat will help the red detail stand out against the neutral base.
Black Bow on Soft Pink Nails

Black bow nail art creates a stylish contrast when paired with a soft pink base. Choose a pale blush or baby-pink polish for the background and allow it to dry completely before adding the black detail. The simplest version uses one tiny black bow on the ring finger, leaving the other nails plain. To paint it, create two small loops with a fine brush and connect them with a miniature center knot. Add short tails only if there is enough space on the nail. Because black polish is highly visible, even a small bow can make a strong statement. This design can be adapted to short nails by reducing the size of the bow rather than trying to fit a large decoration. A glossy finish keeps the pink and black combination crisp and modern. For a slightly more detailed manicure, add a second tiny black dot or heart beside the bow, but keep the accents restrained so the bow remains the main feature.
Glitter Bow Nail Art

A glitter bow can make a simple manicure feel more festive without requiring an elaborate design across every nail. Start with a neutral or pale pink base and select a fine glitter polish that complements it. Silver, champagne, rose gold, or subtle pink glitter can all work well for this style. Paint a small bow using a fine brush, then carefully add glitter while the bow polish is still slightly workable if using loose cosmetic glitter designed for nails. Beginners may find glitter polish easier because it eliminates the need to handle loose particles. Keep the bow relatively small and place it on an accent nail so the sparkle remains controlled. The surrounding nails can stay glossy and plain, creating contrast between the decorated and undecorated fingers. This design works nicely for parties, celebrations, holidays, or evenings when you want a little extra shine. Finish with a suitable top coat to help smooth the surface and protect the detail.
Bow Near the Cuticle

Placing the bow close to the cuticle creates a delicate look and leaves most of the nail surface clean. This is particularly useful for beginners because the design does not need to cover a large area. Apply your chosen base color and let it dry before positioning the bow. A tiny pink, white, red, or black bow can sit just above the cuticle line while the rest of the nail remains glossy. When painting by hand, start with the small center knot and build the loops outward from it. This makes it easier to control the placement and prevents the bow from becoming oversized. Keep a small gap between the design and the cuticle rather than painting directly onto the skin. The look works well on short nails because the decoration uses only a small amount of space. For an especially clean finish, add a thin layer of top coat over the entire nail once the bow is dry.
Pastel Bow Nail Art

Pastel colors make bow nail art feel cheerful, soft, and approachable for everyday wear. Choose one light base color such as creamy white or pale pink, then use pastel shades for the bows. Lavender, baby blue, mint, peach, and soft yellow are easy colors to combine without creating a heavy look. Beginners can paint one bow on each accent nail rather than attempting several different shapes on every finger. A fine brush makes it easier to create the small loops, while a dotting tool can help form the center knot. You can keep all the bows the same color for a coordinated manicure or alternate two complementary pastels. Short nails can use miniature bows, while longer nails provide enough space for slightly larger designs. A glossy top coat will make the pastel colors appear smoother and more vibrant. This style is particularly useful when you want something playful but still subtle enough for casual outfits.
Bow and Polka Dot Combination
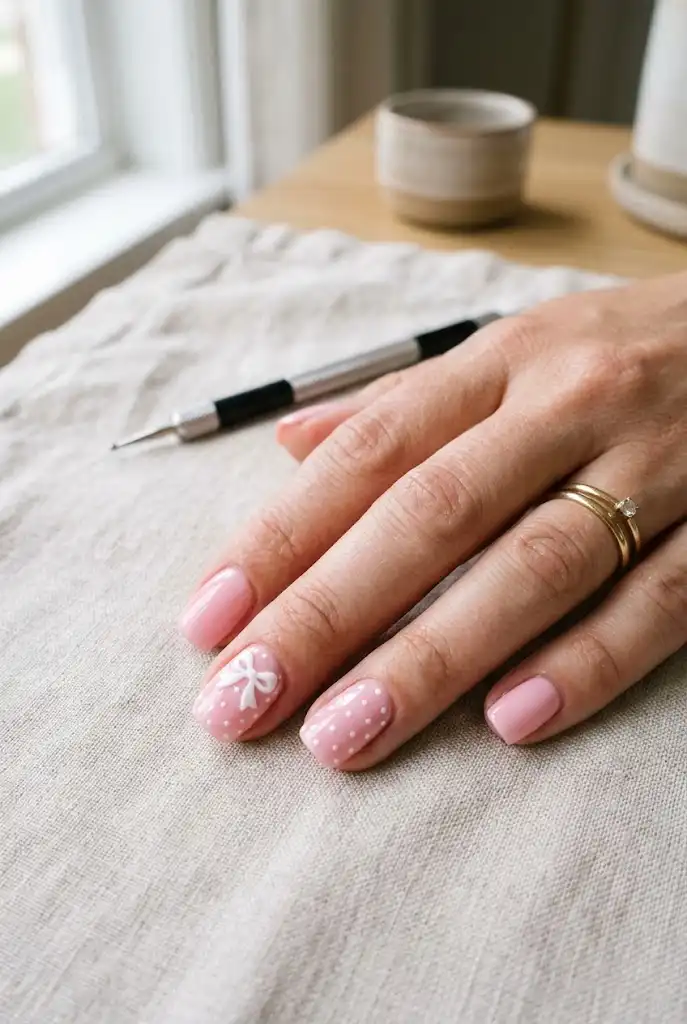
Pairing a small bow with tiny polka dots is an easy way to add more personality without learning complicated nail-art techniques. Start with a simple nude, white, or pale pink base. Paint one small bow on an accent nail, then use a dotting tool to place several tiny dots around it. The dots can match the bow color or use a slightly darker shade for contrast. Beginners should vary the spacing naturally rather than trying to create a perfectly symmetrical pattern. Keeping the dots small prevents them from overwhelming the bow. You can also place the dots only along one side of the nail for a more modern composition. This technique works especially well for playful manicures and can be customized with seasonal colors. A simple glossy top coat brings the separate elements together. If freehand bow painting is challenging, use a bow sticker and add the dots around it by hand.
Double Bow Accent

A double-bow design gives you a slightly more decorative manicure while using the same basic technique as a single bow. Begin with a clean base such as nude, sheer pink, or milky white. Paint one tiny bow near the center of the nail and a second, slightly smaller bow above or below it. The two bows should have enough space between them to remain visually distinct. For beginners, it is easier to use the same color for both bows because the design will look more cohesive even if the shapes are not identical. White, pink, black, or red are particularly easy choices for a clear contrast. This idea works best on medium or longer nails where there is enough vertical space. On short nails, reduce the bows to miniature accents or place the design on only one finger. Finish carefully with a glossy top coat once the polish has dried to avoid smudging the details.
Bow With Tiny Pearl Detail

A tiny pearl placed in the center of a painted bow can make a simple manicure feel more special. Start with a soft neutral base and paint a small bow using a fine nail-art brush. Once the bow is dry enough to handle, place one miniature nail-art pearl in the center knot using nail adhesive suitable for the decoration. Keep the pearl small so it does not overpower the bow. White, cream, or pale pink bows work particularly well with pearl details because the colors create a soft coordinated appearance. This design is better suited to medium or longer nails where there is enough space for the decoration. Beginners can simplify the look by adding the pearl to only one accent nail instead of repeating it across the manicure. A carefully applied top coat around the decoration can help create a smoother finish, while avoiding excessive product over the pearl itself. The result feels delicate enough for everyday wear but can also suit bridal-inspired or special-event manicures.
Minimalist Black Bow on Clear Nails
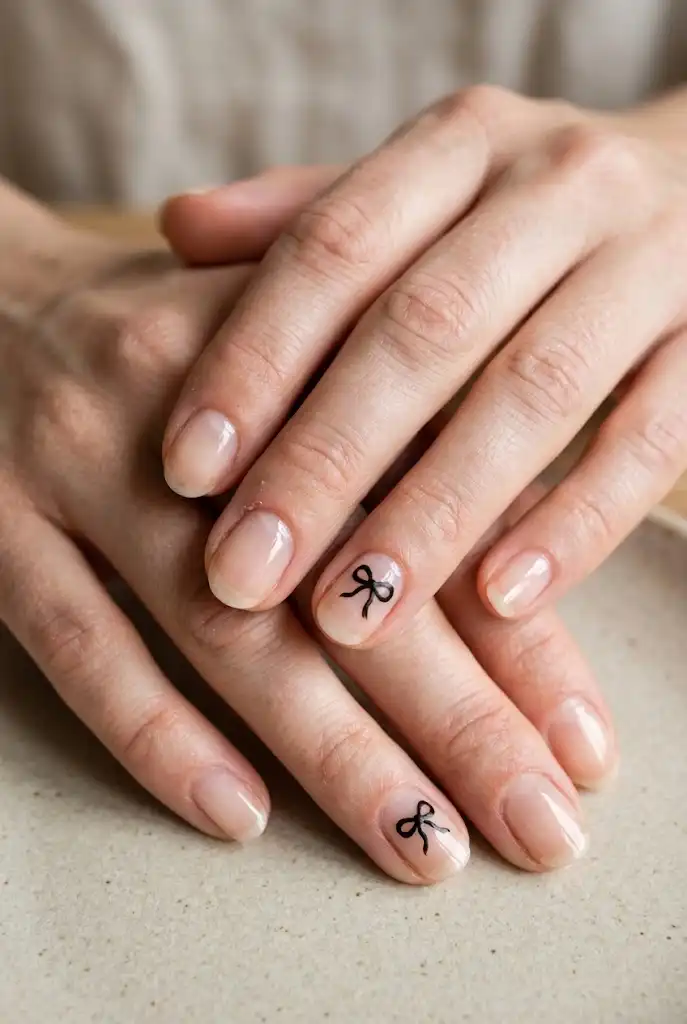
Clear or sheer nails provide an excellent canvas for minimalist black bow art. Instead of covering the nails with a strong background color, apply a sheer pink or transparent-looking base and allow the natural appearance of the nails to remain visible. Paint a very small black bow toward the middle or lower portion of one or two nails. The strong contrast means you only need a tiny amount of black polish to create a recognizable design. This is a practical option for beginners who want nail art that looks modern rather than overly decorative. A very fine brush is helpful for drawing the loops and narrow tails. Keep the remaining nails free from additional decoration so the minimalist concept stays consistent. The design can also work with a matte top coat for a softer finish, although glossy nails provide a classic polished appearance. This style is especially useful when you want a subtle bow manicure that works with many outfits.
Red Bow With French Tips
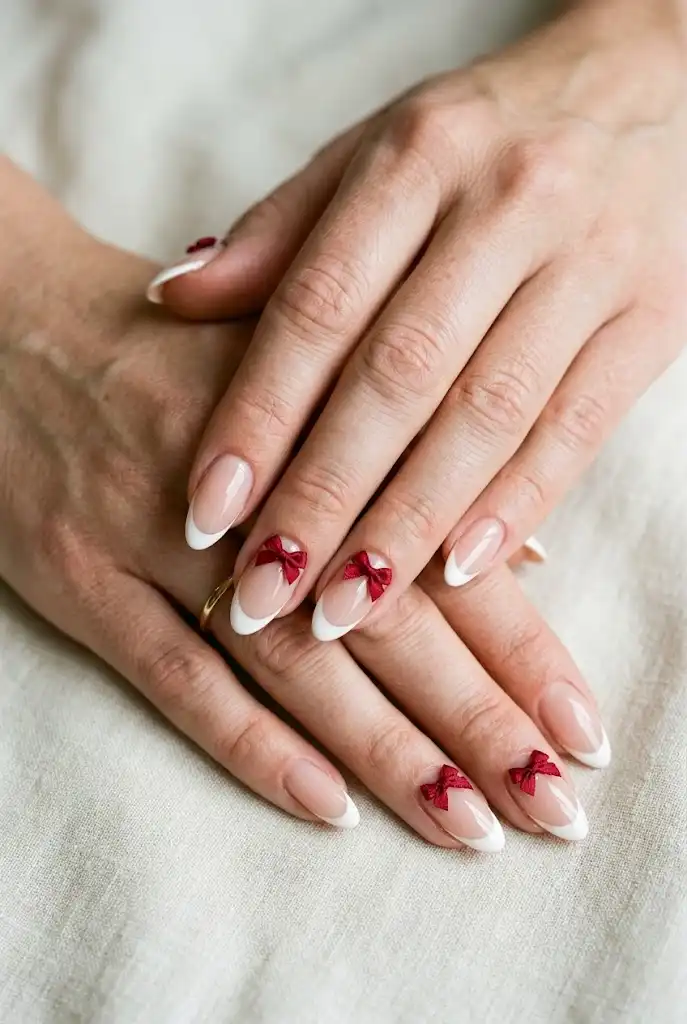
A red bow paired with white French tips creates a classic manicure with a playful accent. Begin by applying a sheer nude or pink base, then create clean white French tips on each nail. Once the tips are completely dry, choose a rich red polish for the bow. Place the bow near the base of one or two nails so the design remains balanced against the white tips. Beginners can use a small bow sticker if painting the loops freehand feels difficult. If painting by hand, make the two loops first and then add the center knot and short tails. The red color should be strong enough to contrast with the base without requiring a large design. This combination can be dressed up for special occasions or kept as a fun everyday manicure. A glossy finish makes the white tips and red bow look crisp while helping protect the finished design.
Bow on a Glitter Accent Nail

Instead of adding glitter directly to the bow, you can make the entire accent nail sparkly and place a simple bow over it. Choose a fine silver, champagne, or pale pink glitter polish for one or two nails and keep the rest of the manicure neutral. Once the glitter base is dry, paint a small bow in white, black, or a contrasting pastel shade. The solid bow helps create definition against the sparkling background. This method can be easier than trying to paint glitter precisely inside a tiny bow shape. Keep the glitter fine rather than chunky so the bow remains clearly visible. The style works particularly well for celebrations, parties, holiday gatherings, and evening events. Beginners can use a glitter polish with built-in shimmer for a simpler application. Finish with a compatible top coat to smooth the surface and protect the nail art.
Bow on Short Square Nails

Short square nails can look beautiful with bow details when the decoration is scaled appropriately. Instead of trying to create a large bow that fills the nail, use a miniature design placed toward the center or near the cuticle. A sheer pink, creamy nude, or milky white base keeps the manicure visually open. Choose a contrasting color such as black, red, or soft pink for the bow. Beginners should make the loops small and use a fine brush with only a small amount of polish. A dotting tool can also help create the tiny center knot. Because short nails have less surface area, one or two decorated accent nails often look more balanced than putting bows on every finger. Keep the remaining nails glossy and simple to emphasize the accent. This approach is practical for anyone who prefers low-maintenance nail lengths while still wanting a feminine nail-art detail.
Tone-on-Tone Bow Design
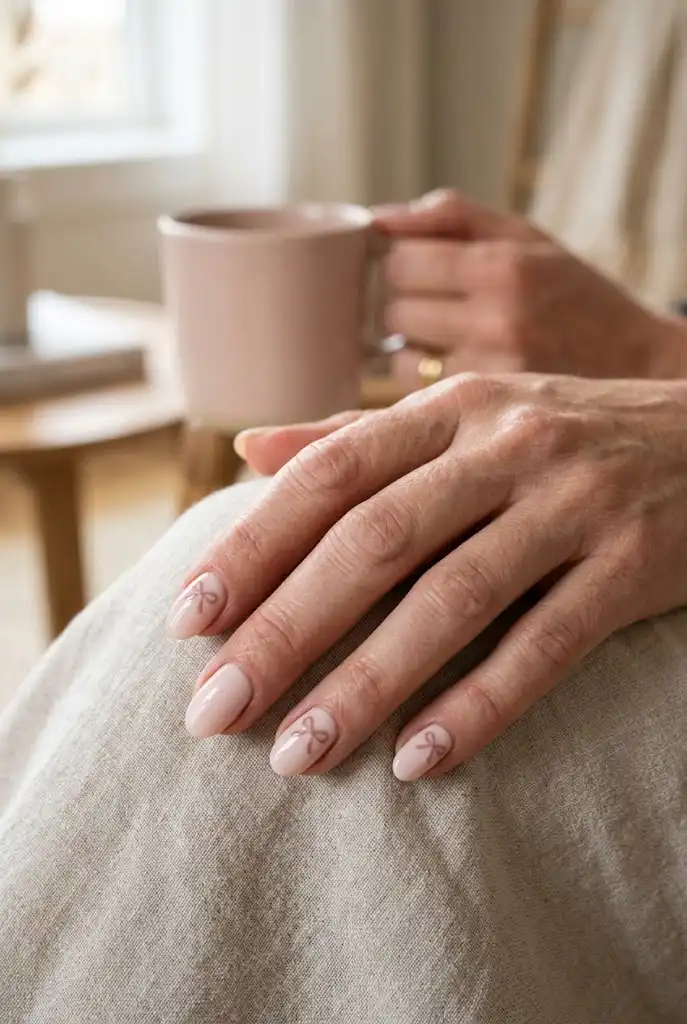
A tone-on-tone bow is a subtle approach for anyone who likes minimalist nail art. Instead of choosing a contrasting color, use two closely related shades, such as pale pink with slightly darker pink or beige with caramel. Paint the base first and allow it to dry completely. Then use the second shade to create a small bow that is visible mainly because of its difference in tone rather than strong contrast. This technique is forgiving because small imperfections are less noticeable when the colors are closely related. It also gives the manicure a sophisticated appearance without requiring extra decoration. Beginners can start with one accent nail and repeat the bow only after becoming comfortable with the brush. A glossy top coat helps the subtle difference between the base and bow remain visible through the shine. This is a useful everyday design for people who want nail art that feels understated and coordinated.
Easy Bow Sticker Manicure

Bow nail stickers are one of the simplest choices for beginners who want a neat design without mastering freehand painting. Start with a clean base color such as nude, soft pink, white, or pale lavender. Allow the polish to dry thoroughly before placing the sticker so it does not shift or become wrinkled. Use tweezers to lift a small bow sticker and position it carefully in the center or near the cuticle. Press the sticker gently from the middle outward so the edges sit flat against the nail. You can place one bow on each ring finger for a minimalist manicure or add tiny bows to several nails for a more decorative result. A clear top coat can help protect the sticker and create a smooth glossy surface. Choose stickers that are proportionate to your nail size rather than using oversized decorations. This is an especially convenient option when you want consistent bow shapes without spending extra time painting each loop by hand.